| |
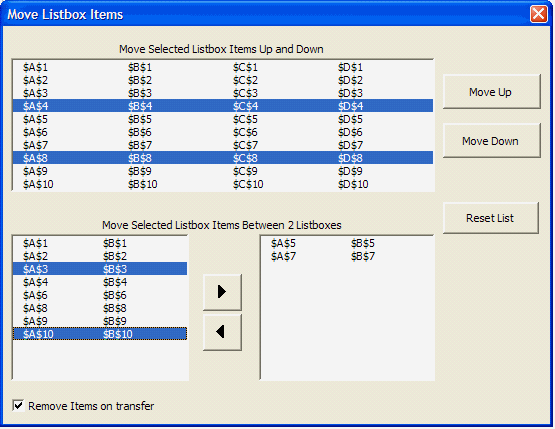
The class module handles the moving
of listbox items up and down or between two specified listboxes.
If the listbox is set to multi-select the selected items will be moved
up and down whilst retaining the spacing. Once a item reaches the top or
bottom it will stop being moved and the spacing between that and the
nearest selected item will be reduced. This will continue until all
selected items are position at the top or bottom of the list. When the
listbox contains multiple columns all the content of each line item is
also repositioned.
When transferring list items between listboxes it is possible to either
remove or retain selected items in the original listbox. When items are
moved between listboxes the items are always appended to the existing
content. No ordering is applied or retained.
The class module will not function for listboxes that are populated via
the RowSource method.
The follow code, from the userform, shows how simple it is to define an
use the class object.
You only need declare a variable to the object and then set a reference
for the listbox to be used and the buttons that control the desired
action.
Private m_clsListMoveUpDown As CListMover
Private m_clsListMoveIn As CListMover
Private m_clsListMoveOut As CListMover
Private Sub UserForm_Initialize()
Set m_clsListMoveUpDown = New CListMover
With m_clsListMoveUpDown
Set .MoveDownButton = Me.cmdDown
Set .MoveUpButton = Me.cmdUp
Set .UpDownList = Me.ListBox1
End With
Set m_clsListMoveIn = New CListMover
With m_clsListMoveIn
Set .TransferButton = Me.cmdMoveIn
Set .TransferFromList = Me.ListBox2
Set .TransferToList = Me.ListBox3
.RemoveItemOnTransfer = CheckBox1.Value
End With
Set m_clsListMoveOut = New CListMover
With m_clsListMoveOut
Set .TransferButton = Me.cmdMoveOut
Set .TransferFromList = Me.ListBox3
Set .TransferToList = Me.ListBox2
.RemoveItemOnTransfer = True
End With
End Sub
The example workbook contains the demonstration userform and the class code.
|

 AJP Excel Information